Saturday, December 26, 2015

ResponsiveWebDesign

There are basically two basic strategies:
  1. Use different views for each target device type.
  2. Use a single combined HTML file that uses CSS and media queries to hide those sections that should not be visible on a particular device. The sections that are not displayed still pull images and take up DOM processing time.
In this section will show a simple TODO application using angular. It employs an angular tag that detects the device type and hides/shows a section of the page or dom element.

You can use "1", when dealing with large images or big sections of the page. Also in mobile devices, hide the less important devices by using angular tags.

The code is all on GITHUB. Use it to test and then follow it as applicable.

Simple to run,

1. Start Mongo DB.


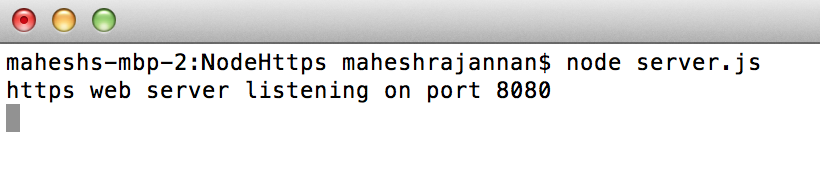
2. Start the app. node server


3. Go to http://localhost:8080


I downloaded a simple TODO app and injected adaptive-responsive tag. 

This is how everything is organized (?) ...;) that is what i hate about angular...so called stipulated way of doing things...and it is so hard to represent.


Sunday, October 18, 2015

HowJavaScriptWorks

In this blog, i will just show with written code how a java script works.With new frameworks like Angular Js, ember js, knock out js, Node js coming in to picture it is now time to take a look of how that works and make a wise choice of js tools (and platforms...yeah i said platforms)
Before we do all that, now just the basics,

1. How Java script works ?
2. How node js works ?

Wednesday, September 16, 2015

SelfSigned-SelfCertified-SSLCertificate

This is what we have done to achieve the result. Please examine the comments in code and run it to fully understand self signed and self certified SSL certificates, so that you can test your application with SSL.
Correlate the file names in the below diagram to that of in the code to understand what is exposed to client and what is exposed to the server.
The private keys of certificate authority are exposed to no one.The certificate authority is added to the (node.js) client so that it can automatically test the application in SSL.


TestingTheSSL

Before we begin writing test cases, let's try to run it and expose one caveat with (with respect to testing) it.

The full steps of how to run it is on github here

I will just cover the steps which is a caveat for junit testing with SSL.

Step 2: (In How To Run) Access Browser


Step 3: Security Exception


Step 4: Add Exception

This 4th step is because this is a self signed certificate and not 3rd party signed certificate.
On our next blog we will cover what this means and how to over come this problem , so that we can successfully test it the automated way.


Step 5: See The Page


Saturday, September 12, 2015

SSL Hands On

This is a continuation of the previous post. For the impatient like me :) please refer source code here and download it.

https://github.com/maheshrajannan/NodeJs-SSL

Please take a look at the diagram here.


A message (SampleSSL marked as (1) in the diagram below) is encrypted by a private key to produce digital signature (SampleSSL-Cert.pem marked as (7) ). I am the signer of this digital certificate (marked as (8) ) . The private public key pair is provided in this case by open SSL (marked as (18) ).

The digital signature (11) , is de-crypted by public key (12) and we have a digest at client (browser).
The input message (14) is hashed and we receive a digest (17) . Both should be same verifying the digest. Now the digital signature is verified and the owner (Me, Mahesh Rajannan) is verified and non repudiated ( i cannot deny it is not my signature) . The hashing algorithm (15) is established during SSL handshake, along with 10 other things.

A bunch of shared secrets are exchanged between sender (client browser) and receiver (server, localhost:8080) through asymmetric cryptography.Asymmetric cryptography is nothing but encrypt with public key and de-crypt with private key.

The source code for this is here. Please feel free to download and enjoy.

 One shared secret is selected, through symmetric key cryptography the message (
Hi from HTTPS) is exchanged , in an encrypted format between client and server,
using the shared key
 
 
References:
 
http://security.stackexchange.com/questions/20803/how-does-ssl-tls-work

https://en.wikipedia.org/wiki/Transport_Layer_Security

https://en.wikipedia.org/wiki/OSI_model

https://en.wikipedia.org/wiki/Public-key_cryptography 
 

SPAConceptDemonstrated

Objective:

In this post, the SSL certificate is created the same way as in the previous post and a working node js web app is created. How SSL works is briefly explained in tandem with how we created this web application.


Please take a look at the certificate creation here.This is the ReadMe file of the project

Step 1: Private Key

maheshs-mbp-2:Certificates maheshrajannan$ openssl genrsa -out sampleSSL-key.pem 1024


Step 2: Certificate Request

maheshs-mbp-2:Certificates maheshrajannan$ openssl req -new -key sampleSSL-key.pem -out certrequest.csr


Note the message used.
  
A challenge password []:SampleSSL

Step 3: Digital Certificate

maheshs-mbp-2:Certificates maheshrajannan$ openssl x509 -req -in certrequest.csr -signkey sampleSSL-key.pem -out sampleSSL-cert.pem

Now lets take a break and run it.


Sunday, June 14, 2015

HttpsConnection

What this blog is about ?

This blog is about setting up a https server with Node js. Node js runs at the 4th layer of OSI model. Therefore it provides a lot of core tweaking options
like CORS and https which are not intuitively available in other frameworks like Spring (No offense pls).

References:

I wrote this blog, following the blog below on https. I just tried it and added more details to it. I do not intend to steal some one else’s work.

Read my blog or the other blog cited below, or both, which ever is most helpful to you.

Ref:http://www.hacksparrow.com/node-js-https-ssl-certificate.html

STEPS:

The steps are stated for firefox, version 38.05.MAC OSC 10.9.5

1. Generate Private Key

openssl genrsa -out hacksparrow-key.pem 1024

<<1-generateRSPrivateKey.png>>


2.Make a certificate request.Provide some basic details and make the request.

openssl req -new -key hacksparrow-key.pem -out certrequest.csr

<2-makeCertificateRequest.png>


3.  Sign the certificate request and get a signed certificate.

openssl x509 -req -in certrequest.csr -signkey hacksparrow-key.pem -out

<<3-SignWithPrivateKey.png>>


4. create the package json file.

<<Enclosed package.json file in code tag>>

{
  "name": "NodeHttps",
  "version": "1.0.0",
  "description": "NodeHttps",
  "main": "server.js",
  "author": "MaheshRajannan",
  "license": "ISC",
  "dependencies": {
    "https": "*",
    "fs": "*"
  }
}


5. Create the server.js file. Please note the location of the cert is obsolete path.

<<Enclosed server.js file in code tag>>


var https = require('https');
var fs = require('fs');

var hskey = fs.readFileSync('/Users/maheshrajannan/Samples/Workspaces/nodeJs/Udemy/sslCerts/hacksparrow-key.pem');
var hscert = fs.readFileSync('/Users/maheshrajannan/Samples/Workspaces/nodeJs/Udemy/sslCerts/hacksparrow-cert.pem')

var options = {
    key: hskey,
    cert: hscert
};

https.createServer(options, function (req, res) {
    res.writeHead(200);
    res.end("Hi from HTTPS");
}).listen(8000, function(){
  console.log('https web server listening on port '+8080);
});

Note: in production environments, certificates are mounted on an external mount and referred to by PATH variables. Using a path relative(or otherwise) to the project, will cause trouble.

Recommended Approach: Establish a path variable CONFIG. Refer to the cert as $CONFIG/ssl.


6. install the dependencies.

npm install
<6-npmInstall.png>


7. Run server.js

node server.js

<<7-RunServer.png>>


8. Access it in the browser.

<<8-AccessInBrowser.png>>


9. Expand I understand the risks and go to the next prompt.

<<9-PromptForException.png>>


10. Add Exception.

<<10-ConfirmSecurityException.png>>


11. After adding exception, you will see the page.

<<11-thePage.png>>


12. Now verify the certificate information.

<<12-CertificateFromBrowser.png>>


13. Click More information

<<13-MoreInformation.png>>


14. View the certificate

<<14-CertificateView.png>>


15. The important thing to note here is that details entered in step 2 and step 14 match.

Notice that the information we provided in creating the certificate is shown. What this means is that browser makes a request and server supplies the certificate information.The SSL connection is then made.

When buying CA signed certificate browser will establish connection after verifying the certificate authenticity. Most(99.9%) CA signed certificates(and their corresponding identities) are trusted by the browser.

16. IMPORTANT NOTE: If using SSL for a service it is important to visit the browser and add exception for the service port as well. Mozilla is very strict, with respect to untrusted SSL. Though you add https://localhost:8080, the service port https://localhost:3000 is not allowed by default , even for making a pre-flights call.